


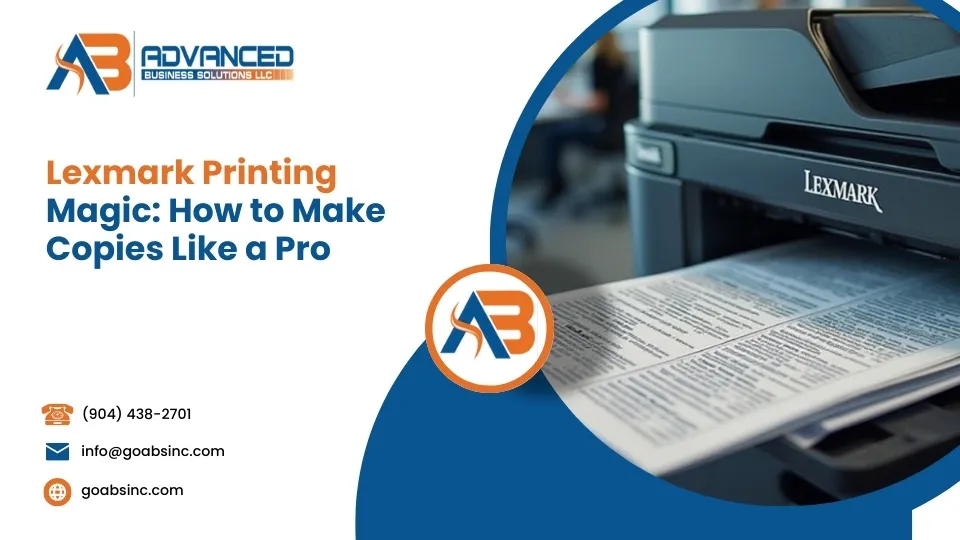
How to make a copy on a Lexmark printer is a simple task that can be done in a few quick steps. Here’s a quick guide to get you started:
- Load your document into the Automatic Document Feeder (ADF) or place it on the scanner glass.
- Access the printer’s control panel and select the “Copy” function.
- Adjust settings such as paper size and copy quality if needed.
- Press the “Start” button to initiate copying.
Lexmark printers are more than just basic printing devices—they are multifunction powerhouses that help streamline document management in your office. By offering robust features such as an Automatic Document Feeder and the ability to print, scan, and fax, Lexmark printers can significantly improve productivity and efficiency.
Whether you are handling daily paperwork, creating professional presentations, or managing a complex document workflow, a dependable Lexmark printer can make life easier for Office Manager Olivia. Lexmark is known for its strong security features, fast performance, and vivid print quality. These attributes are crucial for businesses seeking to optimize their printing and document handling tasks effectively.
So, if you often find yourself managing a sea of documents, how to make a copy on a Lexmark printer is a good skill to master. It’s the perfect blend of simplicity and functionality, catering to all your office printing needs.

How to Make a Copy on a Lexmark Printer
Using the Automatic Document Feeder (ADF)
The Automatic Document Feeder (ADF) is your go-to for quick and easy copying, especially when dealing with multiple pages. Here’s how to make the most of it:
- Load the Documents: Place your documents into the ADF tray. Make sure the pages are aligned and not crumpled to avoid jams.
- Select Paper Size: On the printer’s control panel, choose the paper size that matches your document. If you’re working with mixed sizes but the same width, opt for the Mixed Sizes setting.
- Adjust Copy Settings: Use the control panel to set preferences like copy quality or scaling. You can even adjust the scale from 25% to 400% of the original size.
- Initiate Copy: After setting your preferences, hit the “Start” button. The ADF will automatically feed each page through the scanner.
Using the Scanner Glass
For single pages or delicate documents, the scanner glass is your best option. Here’s how to use it effectively:
- Place the Document: Open the scanner lid and place your document face down on the glass. Align it with the guide marks to ensure accurate copying.
- Select Settings: On the control panel, choose your desired paper size and other settings. If you notice your copies are coming out cropped, double-check the alignment and settings.
- Start the Copy Process: Press the “Start” button to begin copying. The scanner will capture the image and produce a high-quality copy.
Using the scanner glass is perfect for documents that need extra care or when you need to make precise adjustments to the copy settings.

Both methods offer flexibility and ease of use, ensuring your copying tasks are handled efficiently. Whether using the ADF for bulk tasks or the scanner glass for precision, knowing how to make a copy on a Lexmark printer can save you time and hassle.
Step-by-Step Guide to Copying
Adjusting Copy Settings
Getting your copy settings just right is crucial for a smooth copying experience on your Lexmark printer. Here’s a straightforward guide to help you steer the process:
- Access the Home Screen: Start by pressing the “Home” button on your Lexmark printer’s control panel. This will take you to the main menu where you can access all functions.
- Select the Number of Copies: Decide how many copies you need. Use the numeric keypad or the touch screen to input the desired number. It’s important to double-check this to avoid unnecessary printing.
- Choose the Copy Button: Look for the “Copy” icon on the home screen. Tapping this will bring up the copy settings menu.
- Adjust Copy Settings: Here, you can tweak various settings to suit your needs:
- Paper Size: Select the paper size that matches what you have loaded in the tray. If you’re unsure, use the Auto Size Sense feature to let the printer detect the size automatically.
- Copy Quality: Adjust the quality from draft to high, depending on your needs. This is especially useful for text-heavy documents or high-resolution images.
- Scaling: You can scale the copy from 25% to 400% of the original size. Use the “+” or “-” buttons to make fine adjustments, or hold them down for a continuous change.
- Finalize and Start Copying: Once all settings are adjusted, press the “Start” button. The printer will begin copying based on your specified settings.
Taking a moment to customize your copy settings ensures that each document comes out just the way you want it. Whether it’s changing the paper size or adjusting the number of copies, mastering these settings can significantly improve your copying efficiency.
Armed with this knowledge, you’ll find that knowing how to make a copy on a Lexmark printer becomes second nature, saving both time and resources.
Troubleshooting Common Copying Issues
Even with the most reliable Lexmark printers, you might occasionally encounter issues like paper jams or cropped images. Don’t worry—these problems are usually easy to fix. Let’s explore some common troubleshooting tips.
Clearing Paper Jams
Paper jams can occur in several areas of your Lexmark printer. Here’s how to clear them effectively:
- Front Door Jams: Open the front door of the printer carefully. Remove any visible paper stuck in the feed area. Be gentle to avoid tearing the paper, which could cause further jams.
- Rear Door Jams: If the jam is in the rear, open the rear door and slowly pull out the jammed paper. Make sure to check for any small pieces left behind.
- Standard Bin Jams: Sometimes, paper can get stuck in the standard exit bin. Remove the jammed pages by pulling them out in the direction of the paper path.
For detailed instructions, check your Lexmark printer’s manual or the online troubleshooting guide.
Adjusting for Cropped Images
Cropped images are often a result of incorrect paper size settings. Here’s how to adjust them:
- Check Paper Size: Ensure the paper size selected in the copy settings matches the size loaded in the tray. If you’re copying a document with mixed sizes, use the Mixed Sizes option to avoid cropping.
- Use Auto Size Sense: Let the printer automatically detect the original document’s size by selecting the Auto Size Sense feature. This helps prevent cropping by adjusting the settings to fit the scanned image properly.
If these adjustments don’t resolve the issue, refer to the Lexmark support page for more help.
By following these straightforward steps, you’ll be well-equipped to handle any copying hiccups with your Lexmark printer. Whether it’s clearing a paper jam or adjusting for cropped images, these solutions ensure your copying process stays smooth and efficient.
Frequently Asked Questions about Lexmark Copying
How to Copy Something on a Lexmark Printer?
To copy something on a Lexmark printer, you have two main options: using the Automatic Document Feeder (ADF) or the scanner glass.
Using the ADF Tray:
- Place your document in the ADF tray. Ensure the paper is aligned properly to prevent jams.
- Select the number of copies you want from the home screen.
- Press the Copy button.
Using the Scanner Glass:
- Lift the scanner lid and place your document face down on the glass.
- Align it with the guides for accurate scanning.
- Close the lid, choose your copy settings, and press Copy.
How Do I Make Copies from My Printer?
Making copies is a breeze with your Lexmark printer. Here’s a quick guide:
- Select the Paper Size: Make sure the paper size in your settings matches what’s in the tray.
- Choose the Number of Copies: Use the control panel to select how many copies you need.
- Hit Print: Once everything is set, press the Print button to start copying.
How to Make a Photocopy?
Creating a photocopy involves selecting the right settings to match your document’s needs. Here’s how to do it:
- Load Your Document: Use either the ADF tray or the scanner glass.
- Adjust Settings: Modify the paper size and quality settings as needed.
- Print Your Copy: Press the Copy button, and your printer will handle the rest.
For more detailed instructions, you can always refer to your printer’s manual or visit the Lexmark support page.
With these easy steps, you’ll be copying documents like a pro in no time. Whether you’re using the ADF tray or the scanner glass, Lexmark printers make the process simple and efficient.
Conclusion
At Advanced Business Solutions, we believe in making your office operations seamless and efficient. With our expertise in managed IT services and copier leasing, we provide top-tier solutions that improve productivity and safeguard your data. Our focus on flexible leasing terms and automatic supply restocking ensures that your printing needs are met without any hassle.
We understand that every business is unique. That’s why we offer customized solutions custom to your specific requirements. Whether you’re in St. Augustine, Jacksonville, or anywhere in Florida, our team is ready to support you with reliable Lexmark printing systems that make copying a breeze.
By choosing our services, you’re not just leasing a copier; you’re partnering with a company dedicated to optimizing your document management processes. Our goal is to help you understand and lower your printing costs while maintaining high-quality output.
For more information on how we can help your business thrive, visit our Xerox Service and Support page. Let’s lift your document management to the next level together.


Comments are closed