How to make a copy on an Epson printer is a common question for many office managers and home users. Here’s the quick answer:
- Place your document face-down on the scanner glass or in the document feeder
- Press the Home button on your Epson printer’s control panel
- Select “Copy” from the main menu
- Choose the number of copies using + or – buttons (1-99 copies possible)
- Select Color or B&W mode
- Press the Start button to begin copying
Making copies with your Epson printer doesn’t have to be complicated. Whether you’re duplicating important documents for a meeting or creating copies of photos, your Epson printer has you covered with built-in copy functionality that doesn’t require a computer.
The great thing about Epson printers is that they offer both basic copying and advanced options to fine-tune your results. From adjusting paper type and size to tweaking copy density or creating enlarged copies, these machines pack impressive versatility into their compact frames.
One common frustration reported by users is finding the right settings. As one user noted in a forum: “The number of options presented on the printer touchpad for a simple copy is ridiculous.” Don’t worry – we’ll clarify exactly which buttons to press for efficient copying.
In this guide, we’ll walk through the entire copy process step-by-step, from basic copies to advanced techniques, troubleshooting common issues like the “print not available with current settings” message, and maintaining your scanner for crystal-clear results.
What You’ll Learn in This Guide
In this comprehensive guide, we’ll cover:
- The step-by-step process for making basic copies
- How to steer the control panel efficiently
- Advanced settings to customize your copies
- Troubleshooting common copy issues
- Maintenance tips for optimal copy quality
At Advanced Business Solutions, we’ve helped countless Florida businesses optimize their document workflows. Our experience with Epson printers across Jacksonville, Orlando, St. Augustine, and throughout the Southeast USA has given us deep insights into making these versatile machines work smoothly for you.
How to Make a Copy on an Epson Printer: The Core Workflow
Let’s explore the essential steps for making copies with your Epson printer. I’ve helped countless Florida businesses master this process, and the good news is that it’s quite straightforward once you know the basics.
Using the Control Panel to Start — how to make a copy on an epson printer
Think of your printer’s control panel as the command center for all your copying needs. Getting comfortable with it will make copying a breeze:
Start by pressing the Home button (usually marked with a little house icon). This is your reset button that takes you back to the main menu no matter where you are in the settings.
Next, find and select “Copy” on the main menu. Depending on which Epson model sits on your desk, you’ll either tap the Copy icon on a touchscreen, use arrow buttons to highlight it and press OK, or press a dedicated Copy button on older models.
Once selected, you’ll see the copy settings screen appear, showing your current settings for number of copies, color mode, and paper selection. Take a quick glance to make sure everything looks right.
When you’re ready to make magic happen, press the Start button (typically green). Need to stop mid-copy? The Stop/Cancel button (usually red) has you covered.
One of the things I love about Epson printers is their versatility. As their user guide notes, “You can copy color or black-and-white documents or photos onto various sizes and types of paper, including Epson special papers.” This flexibility makes them perfect for both home and office environments.
Placing Originals Correctly — how to make a copy on an epson printer
The way you position your document can make or break your copy quality. Epson gives you two main options:
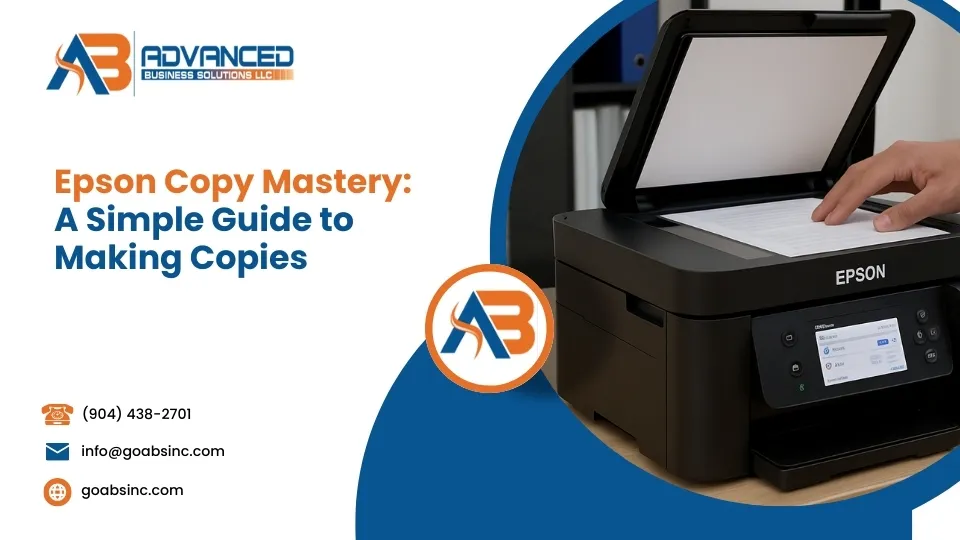
Using the Scanner Glass (Flatbed Scanner) is perfect for single pages, photos, or delicate documents. Open the document cover, place your original face-down on the glass, and align it with the corner arrow marker. Gently close the cover to keep everything flat. This method works wonderfully for books, magazines, ID cards, and other items that won’t feed through an automatic feeder.
Using the Automatic Document Feeder (ADF) saves time when you have multiple pages. Give your stack of papers a quick fan to prevent jams, then insert them face-up into the feeder. Slide the edge guides to match your document width for proper alignment. The ADF is your friend when copying multiple pages of standard-sized documents.
Always check those little orientation arrows on your printer—they’re not just decoration! They show exactly how to position your document so your copy comes out oriented correctly.
Selecting Number of Copies & Color Mode
Now that your document is properly positioned, it’s time to tell your Epson exactly what you want it to do.
For setting the copy count, look for the “Copies” field on your display screen. Use the + and – buttons to adjust the number, or if you’re lucky enough to have a numeric keypad, enter your desired quantity directly. Epson printers can handle up to 99 copies in a single job—perfect for those team meetings or community flyers.
When choosing between Color and Black & White, consider both your needs and resources. The Color option brings your vibrant documents to life and is essential for photos or graphics. The B&W option is perfect for text documents and has the added benefit of processing faster while using less ink.
Quick tip from the field: When I’m helping businesses optimize their printing costs, I always remind them that switching to B&W for internal documents can significantly reduce ink consumption. One Jacksonville client saved nearly 30% on their ink costs with this simple change!
These core steps work across most Epson models, though button locations might vary slightly. Once you’ve mastered these basics, you’ll be copying with confidence in no time.
Fine-Tune Your Copy Settings for Perfect Results
Basic copying works well for standard documents, but your Epson printer has so much more to offer! With just a few tweaks to the settings, you can transform ordinary copies into professional-quality reproductions custom exactly to your needs.
Think of these settings as your copy control center. Many users stick with the defaults, never realizing the full potential of their printer. Let’s explore what’s possible beyond the basics:
| Setting | Default Option | Advanced Options |
|---|---|---|
| Paper Size | Letter/A4 | Legal, 4×6, 5×7, 8×10, etc. |
| Paper Type | Plain Paper | Photo Paper, Envelope, Cardstock |
| Quality | Standard | Draft, Fine, Photo |
| Density | Medium (0) | Lighter (-3 to -1), Darker (+1 to +3) |
| Layout | 1-up | 2-up, 4-up, ID Card Copy |
| Reduce/Enlarge | 100% | Auto Fit, 25-400% custom |
| Color Balance | Standard | Adjust RGB levels individually |
Adjust Paper Source, Size & Type
Getting these settings right is like telling your printer exactly what you want it to do. It’s the difference between a mediocre copy and one that looks like the original.
When it comes to paper source, you’ve got options. The cassette (main paper tray) works perfectly for everyday copying on standard paper. For specialty papers or envelopes, the rear feed or MP tray gives you better control. Can’t decide? The Auto Select option lets your printer choose based on your other settings.
For paper size, simply tell your printer what you’re working with. Whether it’s standard Letter or A4, or something more specialized like Legal or photo sizes, your Epson has you covered.
The paper type setting is crucial but often overlooked. Your printer adjusts ink flow and drying time based on this setting, so matching it to your actual paper makes a huge difference in quality. Plain Paper works for everyday documents, while Photo Paper settings optimize color reproduction for your cherished memories.
Here’s a helpful tip from a real user experience: If you’re looking for the “Plain Paper” option but can’t find it, try turning off the “Borderless” setting first. As one user with the amusing forum name “Ink Stained Fingers” finded: “the ‘borderless’ option most likely prevents you from selecting normal/copy paper, disable this option and try again.” This simple fix has saved many users from unnecessary frustration!
Change Layout, Zoom & Duplex Options
Want to fit more on a page or enlarge fine details? The zoom settings (also called Reduce/Enlarge) let you adjust size from a tiny 25% all the way up to a magnified 400%, in precise 1% increments. This level of control is perfect for making small text more readable or fitting large documents onto standard paper.
Layout options add another dimension to your copying toolkit. The standard 1-up gives you a straightforward copy, but 2-up and 4-up settings let you fit multiple originals onto a single sheet – perfect for meeting handouts or saving paper. My personal favorite is the ID Card Copy feature, which neatly places both sides of your ID or license on one sheet.
For those with duplex-capable printers, making two-sided copies is a breeze. Just select the “2-Sided” option and choose whether you want pages to flip like a book (long edge) or like a notepad (short edge). Your printer handles the rest, saving paper and creating professional-looking documents.
Even if your model doesn’t have automatic duplex, you can still create two-sided copies manually. First copy all the front sides, then reload those copies to print on the back. It takes a bit more attention, but the paper savings are worth it!
At Advanced Business Solutions, we’ve helped countless Florida businesses find these “hidden” features on their Epson printers. What starts as a simple how to make a copy on an Epson printer question often leads to finding these powerful customization options that transform everyday office tasks.
Paper Handling & Duplex Tricks Made Easy
Making copies on both sides of a page or handling special paper types doesn’t have to be complicated. With a few simple tricks, you’ll be handling paper like a pro on your Epson printer.
Choosing the Right Paper & Avoiding “Print Not Available with Current Settings”
We’ve all been there – you’re in a hurry to make copies when suddenly your Epson displays that frustrating “Print not available with current settings” message. Don’t worry! This usually happens when there’s a mismatch between what you’ve selected and what your printer can actually do.
The most common culprit is trying to use borderless printing with plain paper. Epson printers reserve borderless printing for photo papers only. The simple fix? Turn off the borderless option when using regular copy paper. As one relieved user finded: “Once I disabled ‘Borderless’ in the settings, the ‘Plain Paper’ option suddenly appeared!”
Other common mismatches include selecting photo-quality settings with regular paper or trying to use duplex printing with paper that’s too thick. When you see this error message, check that your paper type setting matches what’s actually loaded in your printer.
Paper weight matters too. For double-sided copying, stick with standard 16-24 lb plain paper. Heavier cardstock or specialty papers often can’t make the tight turn required for automatic duplexing.
Why a Single-Page Copy Prints on Two Sheets—And the Fix
It’s one of the most common copying frustrations – you place a single document on the scanner glass, but somehow your printer splits it across two sheets. What’s going on?
The most likely cause is a paper size mismatch. If your original is Legal size but your printer settings are for Letter, the printer will try to accommodate by splitting the content. Similarly, if your zoom setting is too large (above 100%), the content won’t fit on a single page.
The easiest fix is to use the “Auto Fit” feature:
- Press the Home button on your control panel
- Select Copy
- Steer to Advanced Settings
- Select “Reduce/Enlarge” and choose “Auto Fit Page”
This tells your Epson to automatically scale the content to fit your selected paper size. If you prefer more control, set the zoom manually to 100% or lower.
Sometimes the issue stems from a layout setting problem. Your printer might be set to split documents across pages when the “Page Layout” setting isn’t on the standard “1-up” option. Double-check this setting if auto-fit doesn’t solve your problem.
One user shared this time-saving tip: “I keep a shortcut to my most common copy settings on the home screen of my Epson. Now I never have to dig through menus when I’m in a hurry!”
At Advanced Business Solutions, we’ve helped countless Florida businesses optimize their document workflows. These simple paper handling tricks can save you time, reduce waste, and keep your office running smoothly.
Fixing Common Copy Errors & Messages
Let’s face it—even the most reliable Epson printers occasionally throw a curveball your way. Those mysterious error messages can be frustrating, especially when you’re in a rush to make copies for an important meeting.
When your Epson printer displays that dreaded “Print not available with current settings” message, it’s typically because you’ve selected a combination of settings that don’t work together. For instance, you might have selected borderless printing with plain paper—a combination that won’t work. The simple fix is to either turn off borderless printing or switch to photo paper.
If you see “Load paper in cassette,” your printer is telling you either the tray is empty or it’s expecting a different paper size than what’s loaded. Double-check both your physical paper and your digital settings to make sure they match.
Paper jams happen to everyone. When they do, follow the on-screen instructions carefully to clear the jam without damaging your printer’s internal components. And that “Close cover” message? It’s exactly what it sounds like—somewhere on your printer, a cover isn’t fully latched.
Ink-related messages like “Ink low” or “Replace ink cartridge” are straightforward. You can usually continue printing with low ink (though quality may suffer), but once you hit the “Replace” message, you’ll need to swap in a fresh cartridge before copying can continue.
Quick Reset & Factory Defaults
Sometimes the easiest fix is simply starting fresh. If your copy job isn’t working out, press the Stop/Cancel button and begin again with a clean slate. This quick reset only affects your current job, not your saved settings.
For more persistent problems, a full reset of your copy settings might be in order. Steer to your Setup or Settings menu, select “Copy Settings,” and look for the option to “Restore Default Settings” or “Factory Settings.”
When all else fails, a hardware reset can work wonders. Here’s how:
- Turn off your printer completely
- Find the Reset button (often located near the Ethernet port)
- Press and hold this button while turning the printer back on
- Release the button after the printer starts up
We’ve seen this work countless times at Advanced Business Solutions. As one of our technicians likes to say, “A hardware reset is like a good night’s sleep for your printer—it wakes up refreshed and ready to cooperate.”
Advanced Troubleshooting Steps
If you’re dealing with quality issues rather than error messages, try these proven solutions:
When you notice horizontal banding or lines on your copies, first run a printhead cleaning cycle through your maintenance menu. If that doesn’t solve it, perform a printhead alignment, and check if any ink cartridges need replacement.
Vertical lines on your copies usually indicate something on the scanner glass. Clean it thoroughly with a lint-free cloth and glass cleaner (sprayed on the cloth, never directly on the glass). Don’t forget to check the thin calibration strip inside the scanner—it’s often overlooked but can cause persistent line issues.
For faded or incorrect colors, first check your ink levels. Low cyan, magenta, or yellow cartridges can cause strange color shifts. Running a color calibration can also help, as can manually adjusting RGB levels in your copy settings.
If your copies come out skewed or misaligned, ensure your originals are properly positioned on the glass, with the corner aligned to the reference mark. Check that your paper guides are properly adjusted, and consider running your printer’s alignment utility.
One of our most effective tricks at Advanced Business Solutions is cleaning the translucent film inside the scanner unit. This thin film can collect dust and debris that standard glass cleaning misses. Use slightly dampened cotton swabs and gentle pressure to clean it, and you’ll often see immediate improvements in copy quality.
Most copy issues have simple solutions once you know where to look. With these troubleshooting steps in your arsenal, you’ll be back to making perfect copies on your Epson printer in no time.
Maintenance for Crystal-Clear Copies
Regular maintenance is the secret weapon for getting consistently beautiful copies from your Epson printer. A little TLC goes a long way toward extending your printer’s life and keeping those copies looking professional.
Cleaning the Scanner Glass & ADF
Think of your scanner glass as the window to copy quality. Even tiny smudges or dust particles can show up as annoying marks on your copies. Here’s how to keep it sparkling clean:
For the scanner glass, power off your printer first (safety first!), then open the document cover to reveal the glass surface. Grab a soft, lint-free cloth – microfiber works wonders here – and lightly dampen it with a non-abrasive glass cleaner. Never spray directly on the glass! Gently wipe in a side-to-side motion, paying special attention to that thin calibration strip along one edge that many people forget about. This strip helps your printer align everything correctly. Finish by drying thoroughly with a clean section of your cloth.
“We’ve seen countless copy quality issues resolved with just a proper glass cleaning,” shares our technical team at Advanced Business Solutions. “It’s amazing how often this simple fix works.”
If your model has an Automatic Document Feeder, don’t forget to clean that too. Open the ADF cover and you’ll find a narrow glass strip – this needs the same gentle cleaning as the main glass. While you’re there, wipe down those white rollers with a slightly damp cloth to prevent paper feed issues. Just make sure everything is completely dry before closing everything up.
Pro tip: Mark your calendar for regular cleaning – weekly in busy office environments or monthly for home use. In our experience supporting Florida businesses, most how to make a copy on an Epson printer questions end up being resolved through three simple checks: correct paper settings, adequate ink levels, and a clean scanner glass.
Supported & Unsupported Media Types
Your Epson printer is versatile, but it does have preferences when it comes to paper. Knowing which media types work best will save you time and frustration.
Your printer will happily work with plain paper (16-24 lb weight), Epson Bright White Paper, and various Epson Presentation and Photo Papers. These are the workhorses for everyday copying. Card stock (within supported weights) works great for sturdier projects, and most models can handle envelopes through the manual feed tray.
On the flip side, some materials just don’t play nice with your Epson. Very thin papers (under 16 lb) tend to wrinkle or jam, while extremely thick papers (over 68 lb) might not bend properly through the paper path. Those fancy textured or embossed papers might look beautiful, but they can cause uneven prints. Pre-cut photo papers with tabs can catch on internal components, and iron-on transfers often have special handling requirements.
As for transparencies, check your specific model – some Epson printers support them, while others don’t. When in doubt, consult your user manual or give us a call at Advanced Business Solutions.
Your Epson is quite accommodating when it comes to paper sizes. Standard options like Letter (8.5 × 11 inches), Legal (8.5 × 14 inches), and A4 (8.3 × 11.7 inches) work perfectly. For photo projects, sizes like 4 × 6 inches, 5 × 7 inches, and 8 × 10 inches are typically supported too.
Matching your paper type settings to what’s actually loaded in your printer is crucial for getting the best copy quality. We’ve helped many Jacksonville and Orlando businesses troubleshoot copy issues that came down to this simple mismatch.
With regular cleaning and the right paper choices, your Epson printer will reward you with crisp, clear copies every time – making document management a breeze rather than a headache.
Frequently Asked Questions about Epson Copying
After helping hundreds of Florida businesses set up their Epson printers, we’ve collected the questions that come up most often. Here are straightforward answers to the most common Epson copying questions we hear at Advanced Business Solutions.
Can I make double-sided copies automatically?
Absolutely! If your Epson printer has automatic duplex capability, making two-sided copies is a breeze:
- Place your documents in the ADF or on the scanner glass
- Select Copy from the home screen
- Look for the 2-Sided option in the settings menu
- Choose whether you want the binding on the long edge (like a standard document) or short edge (like a notepad)
- Set any other copy preferences you need
- Press Start and let the printer do the work
Don’t have automatic duplex? No problem! You can still make two-sided copies manually. First copy all your odd-numbered pages, then flip the stack, reload them, and copy the even pages on the back. It takes a bit more attention, but the results are just as good.
One of our Jacksonville clients told us: “I thought I needed a new printer until your team showed me how to do manual duplex copying. Now I’m saving paper and it looks professional!”
What is the maximum number of copies I can set?
Your Epson printer can make up to 99 copies in a single job. Perfect for those team meetings or classroom handouts!
To set a high number of copies, simply select Copy from the home screen, find the Copies field, and use the + button to increase the number. Hold it down to count up quickly, or if your model has a numeric keypad, just type in exactly how many you need.
Need more than 99 copies? Just run multiple copy jobs. We’ve helped several Orlando businesses set up efficient workflows for large copy jobs by breaking them into manageable batches.
Where can I download my model’s full user manual?
Finding your Epson printer’s complete manual is straightforward:
Visit the Epson Support website at www.epson.com/support and enter your printer model number. Once you select your specific model, look for the “Manuals and Warranty” section where you can download the full User’s Guide as a PDF.
We’ve noticed many of our St. Augustine clients don’t realize how helpful these manuals can be. They contain detailed information about every function of your printer, including advanced copy features you might not find on your own.
At Advanced Business Solutions, we maintain our own library of user manuals for popular Epson models. If you’re having trouble finding yours, just give us a call. Our Florida customers appreciate having a local resource for this kind of help – sometimes it’s just easier to talk to a real person than to hunt through websites!
Understanding your printer’s full capabilities is the key to getting the most value from your investment. The manual might seem intimidating at first glance, but it’s organized to help you find exactly what you need when you need it.
Conclusion
After exploring the ins and outs of your Epson printer’s copy function, you’re now equipped to handle everything from quick one-page copies to more complex document reproduction tasks. Your printer is more versatile than you might have realized, offering a surprising range of capabilities right from its control panel.
Think about how far we’ve come in this guide. We started with the basics—placing a document, pressing a few buttons, and watching your copy emerge. But we’ve finded so much more along the way.
Basic copying truly is straightforward once you know the steps: position your original properly, tap the Copy icon, set your quantity and color preference, then hit Start. Within seconds, you have your duplicate in hand, no computer required.
The real power, though, lies in those advanced settings we explored. Need to darken a faded document? Adjust the density. Making handouts for a presentation? Try the 2-up layout to save paper. Working with photos? Select the proper paper type and quality settings for vivid reproduction. Your Epson gives you these controls right at your fingertips.
We’ve also tackled those frustrating moments when things don’t go as planned. Pesky “Print not available with current settings” message? Now you know it’s usually just a mismatch between your paper selection and feature settings. And those mysterious lines appearing on your copies? A quick cleaning of the scanner glass often does the trick.
Speaking of cleaning, regular maintenance makes all the difference in copy quality. A weekly wipe-down of your scanner glass with a microfiber cloth can prevent most quality issues before they start. Your copies are only as good as your scanner glass is clean!
Here at Advanced Business Solutions, we’ve helped countless Florida businesses streamline their document workflows. From Jacksonville to Orlando, St. Augustine and beyond, we’ve seen how mastering these seemingly small office tasks can add up to significant time savings and productivity gains.
Whether you’re a small business owner making copies of receipts, a teacher duplicating classroom materials, or an office manager preparing packets for a meeting, these techniques will help you get professional results consistently. Your Epson printer is a powerful tool when you know how to use it effectively.
For more specialized needs or ongoing support with your office equipment, our team is here to help. Our flexible leasing options and automatic supply replenishment services ensure you’ll never be caught in that dreaded moment of running out of ink mid-job.
With the right knowledge and a bit of maintenance, your Epson printer will deliver reliable copying performance for years to come—saving you time, reducing frustration, and keeping your workflow smooth.






Comments are closed